
Smoked Texas Brisket
Brisket has quickly became the go to for backyard cooking enthusiasts.
This cut of meat can be difficult to master but when you have, you'll be the envy of all your friends.
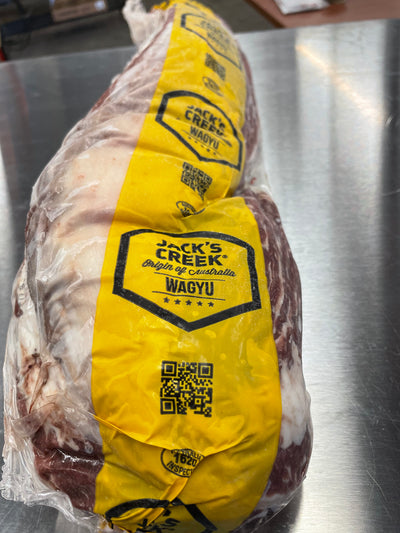
For this cook we're using a 15 lbs full packer brisket we purchased at our local grocery store. You don't have to spend a lot of money on these cuts. We purchased this one for just under $60 and are cooking today on our Yoder YS1500 pellet grill.
We've included some links for these products for ease of reference.
15 lbs Packer Brisket | 8 Hour Cook | Oak Pellets
******INGREDIENTS******
INJECTION
Meat Church Holy Cow Brisket Injection

RUB
Lanes Brisket & Meat Church Holy Cow


PELLETS

******PREPARATION******
Night Before
Trim the brisket the night before so you have time in the morning to prepare your smoker and season the meat. When trimming, make sure to remove any grey parts of the meat from the meat processing plant and create a smooth round brisket for better air flow.
Trim the fat cap tp 1/4" thick and remove any silver skin from the flat. Remove any large hard fat from the deckle.
Place the trimmed brisket in a foil pan and inject in a checkerboard patter to ensure good coverage. Repeat the process for both sides. Place the injected brisket in the refrigerator overnight.
Morning Of The Cook
You'll want to give yourself about an hour prior to getting the brisket on your smoker, so depending on your smoker you'll want to allow time to get your smoker up to temp. Some take longer than others. Set to 275 degrees.
Remove the brisket from the refrigerator, pat dry and season. Season the fat side first as we are cooking fat side down on this cook. Let sit for 30 minutes and repeat on the meat side. Make sure to season evenly and get all sides.
The Cook
Now it's time to get your brisket on. Fill a water pan with warm water and add what you like. Chopped onions, garlic, & peppers work well as it creates a nice aroma over the cooking process. It's a long cook so make sure to keep an eye on your water pan.
Insert a meat probe in the flat at the thickest part. It's not important at this time to watch internal temps as this part of the cook is about building bark. On this cook we're using a Yoder YS1500 pellet grill and placing the brisket on the upper rack. Pellet grills generate heat from the bottom so we don't want it too close to the heat source.
One item to note about pellets. They are not all created equal. Make sure to use natural hardwood pellets for cooking. There are many on the market. We use Furtado Farms Hardwood Pellets.
After about 3 hours check to see how your bark is building and to make sure it's not drying out. At this point it's a good idea to spritz. Use a spray bottle with a "SPRAY", not a stream as we don't want to spray off the bark we have been building. You can use Apple Cider Vinegar & Water mixed 50/50. Check back every hour and spritz. Keep this process up for about 6 hours where it will be time to wrap.
The Wrap

After about 6 hours the internal temp should be about 165 degrees. Every brisket is different so keep and eye on temps and most importantly how it looks. There should be a nice bark and some moisture forming on the top. At this point it should be reaching or in the stall. The stall is where the muscles contract and evaporative cooling takes place (The Stall). Now is a good time to wrap.
Here we have two options for wrapping.
1. Foil - When wrapping in foil you can add some liquid inside the wrap like beef broth or your choice. We've used beef broth with butter. Mixed with the rendered fat produces a fair bit of juice to be used for dipping when done. Keep in mind that when using foil the wrap must be tight so not to create a steaming or pot roast effect so wrap it tight.
2. Butcher Paper - When wrapping in butcher paper spritz the paper lightly with your spritz mixture and a good spritzing on the top of the brisket before wrapping. Wrap tight to retain moisture.
Back On
After you've wrapped your brisket, get it back on and insert the meat probe back into the point and watch for internal temps. It's a good idea to set a probe alarm to 195 degrees so you get an alert to notify you it's getting close. You'll want to take this brisket all the way to 203 - 205 degrees. When you're close it's a good idea to temp your brisket. At this point we're looking for feel. Almost like there is very little to no resistance when inserting the probe. At this point it's time to pull and let rest.
The Rest
The rest is one of the most important parts of this entire cook. You don't want to cut early and have a tough brisket and ruin what you just spent 8 hours doing. So let it rest so the juices distribute back into the brisket. You will need at least an hour. If you're going to leave it out, cover with a towel for an hour. You can also place the brisket in a cooler. This is helpful so if you have sides to make or have company coming you can leave the brisket in the cooler for 3-4 hours.
The Moment Of Truth
Now's the time to see what all your hard work has produced. You know it's going to be good. We just have to slice it properly now.
When slicing a brisket you must slice in two ways. The first is the flat. Slice against the grain in slices no bigger than 1/4". You can go thinner here. Once you get to the point you will rotate and slice in the opposite direction at 1/4" thick. The point is the fatty cut and in Texas BBQ it's the money cut.
For best slicing results use a long 12" non perforated slicing knife. If you don't have one, get one. It's worth the investment when it comes to slicing brisket.
Enjoy!
